
How it works
From a boundary on a map to a photo at the door
Six steps, two roles. An admin sets up the work and reads the results; a worker takes a photo and moves to the next house.
The product
Five screens, start to finish
Screenshots from a working account, not mockups. This is the whole tool.
Step one — the admin
Trace the neighbourhood, get the addresses
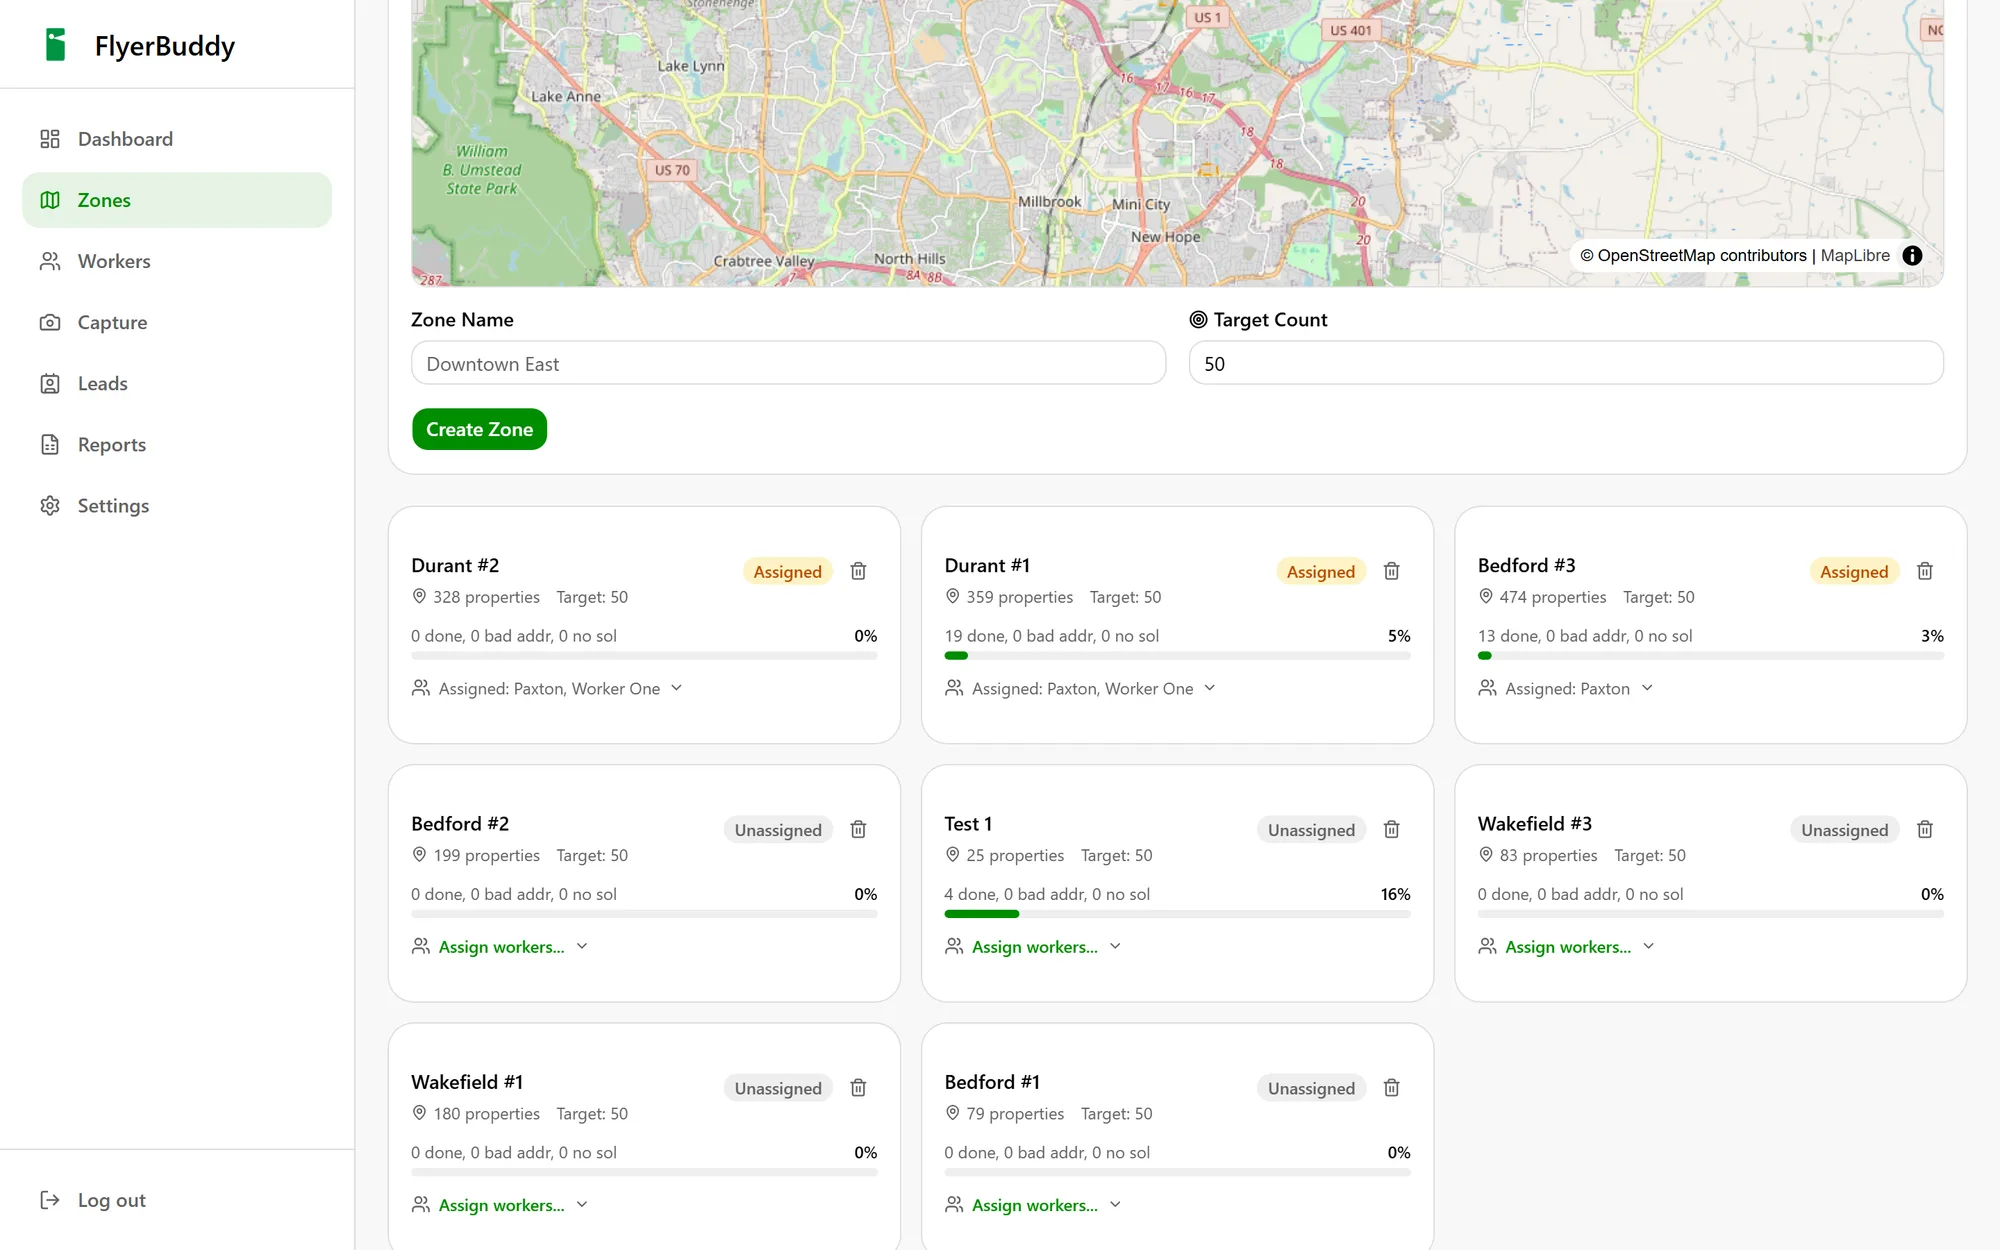
Search an address, draw the boundary, name it. FlyerBuddy reads the buildings inside the shape from OpenStreetMap and checks each against a geocoder, so a zone arrives with a real address list instead of an empty polygon. Existing zones show as orange outlines so you never draw over yourself.
- Address search and satellite toggle while drawing
- Existing zones overlaid so territory does not overlap
- Target door count set per zone
Step two — the territory
Every door inside the boundary becomes a pin
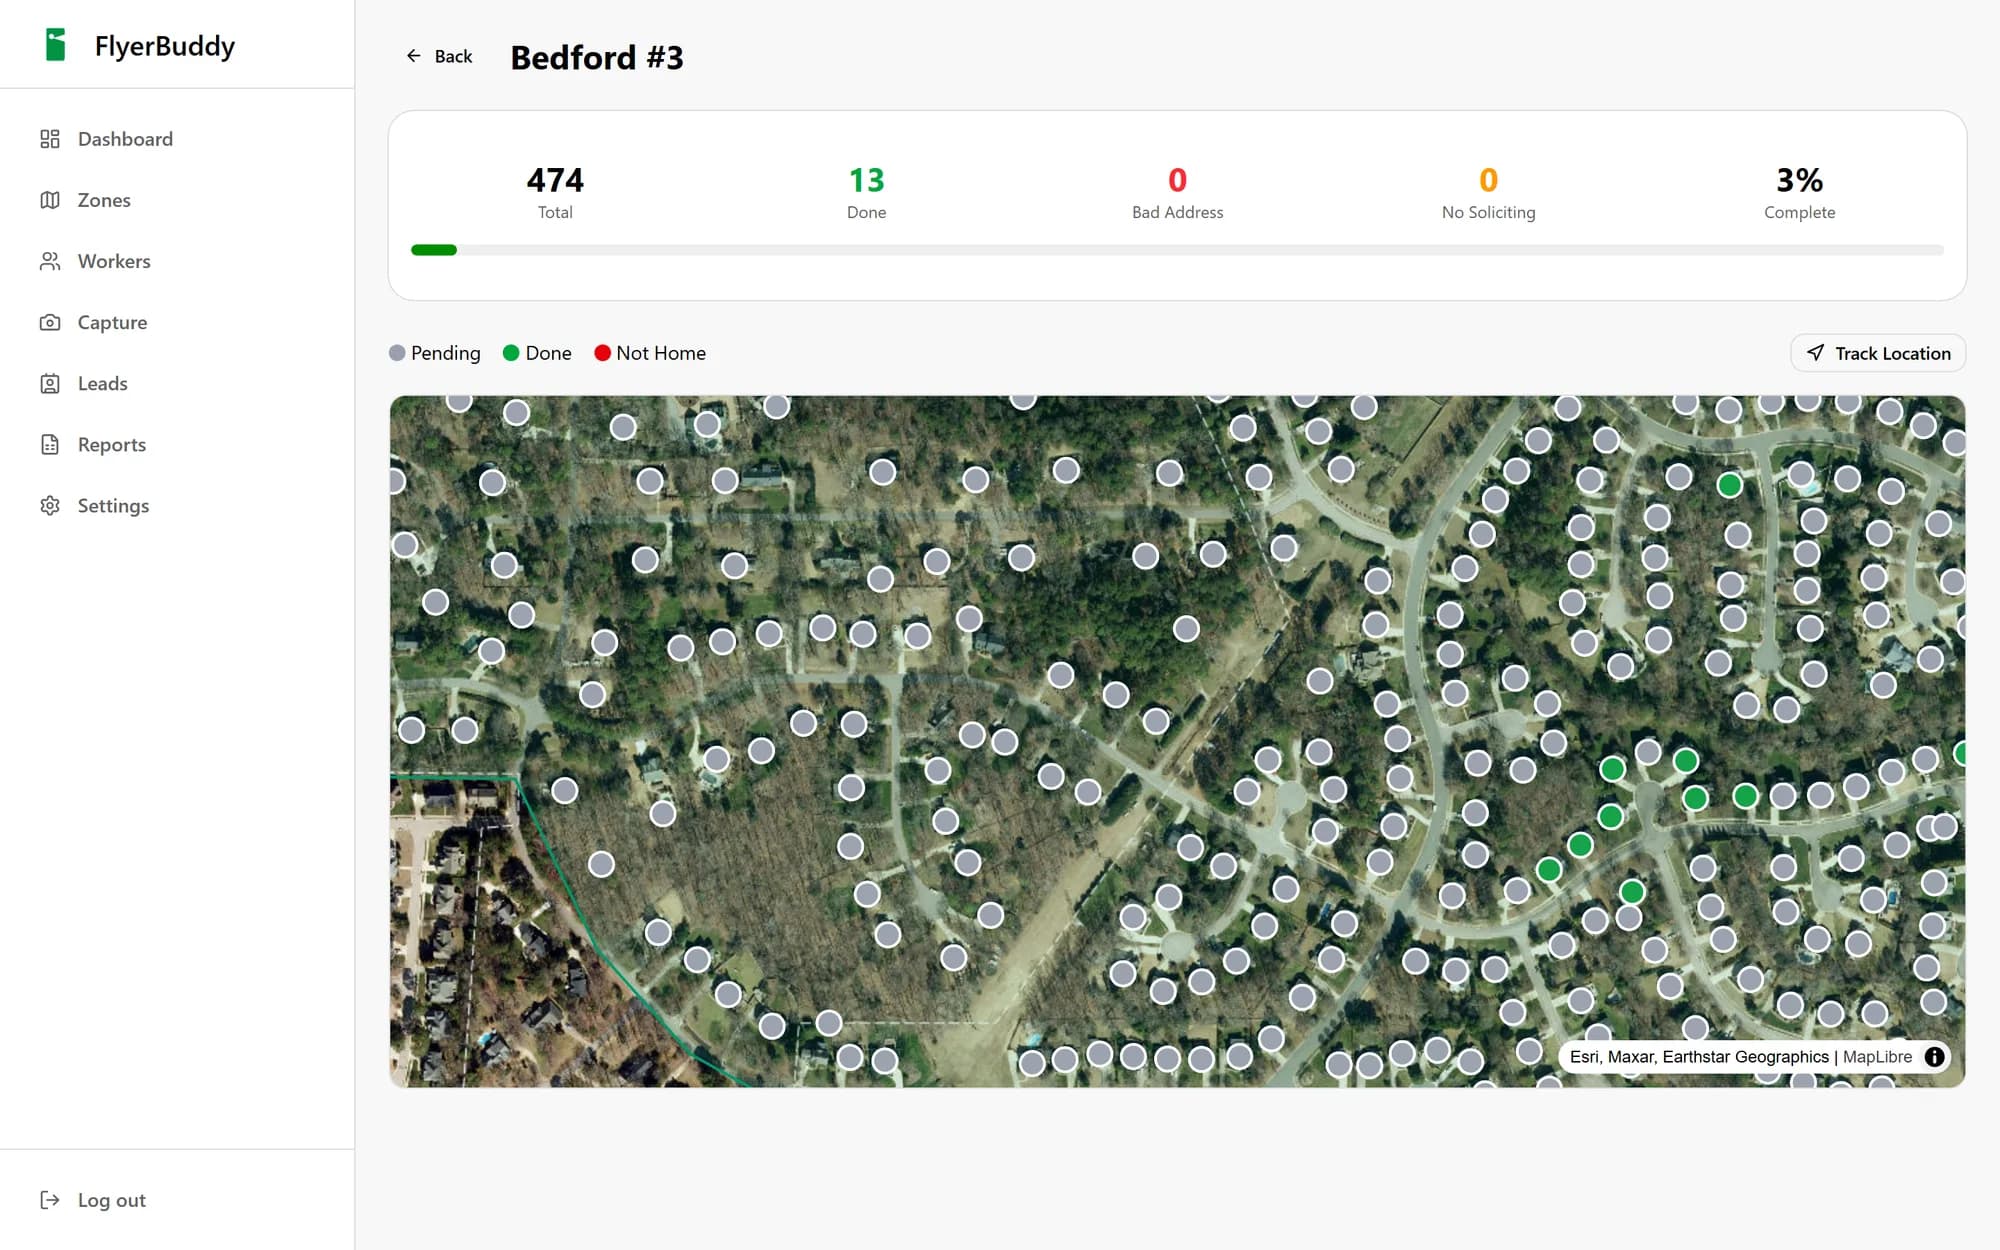
This is a single zone holding 328 properties. Grey is untouched, green is delivered with a photo and GPS fix, red is a bad address. The counters across the top are computed in the database, so they stay right whether the zone holds fifty doors or five thousand.
- Satellite or street base layer
- Live totals: done, bad address, no soliciting, percent complete
- Tap any pin for its address, status and notes
Step three — the crew
Hand each worker their own streets
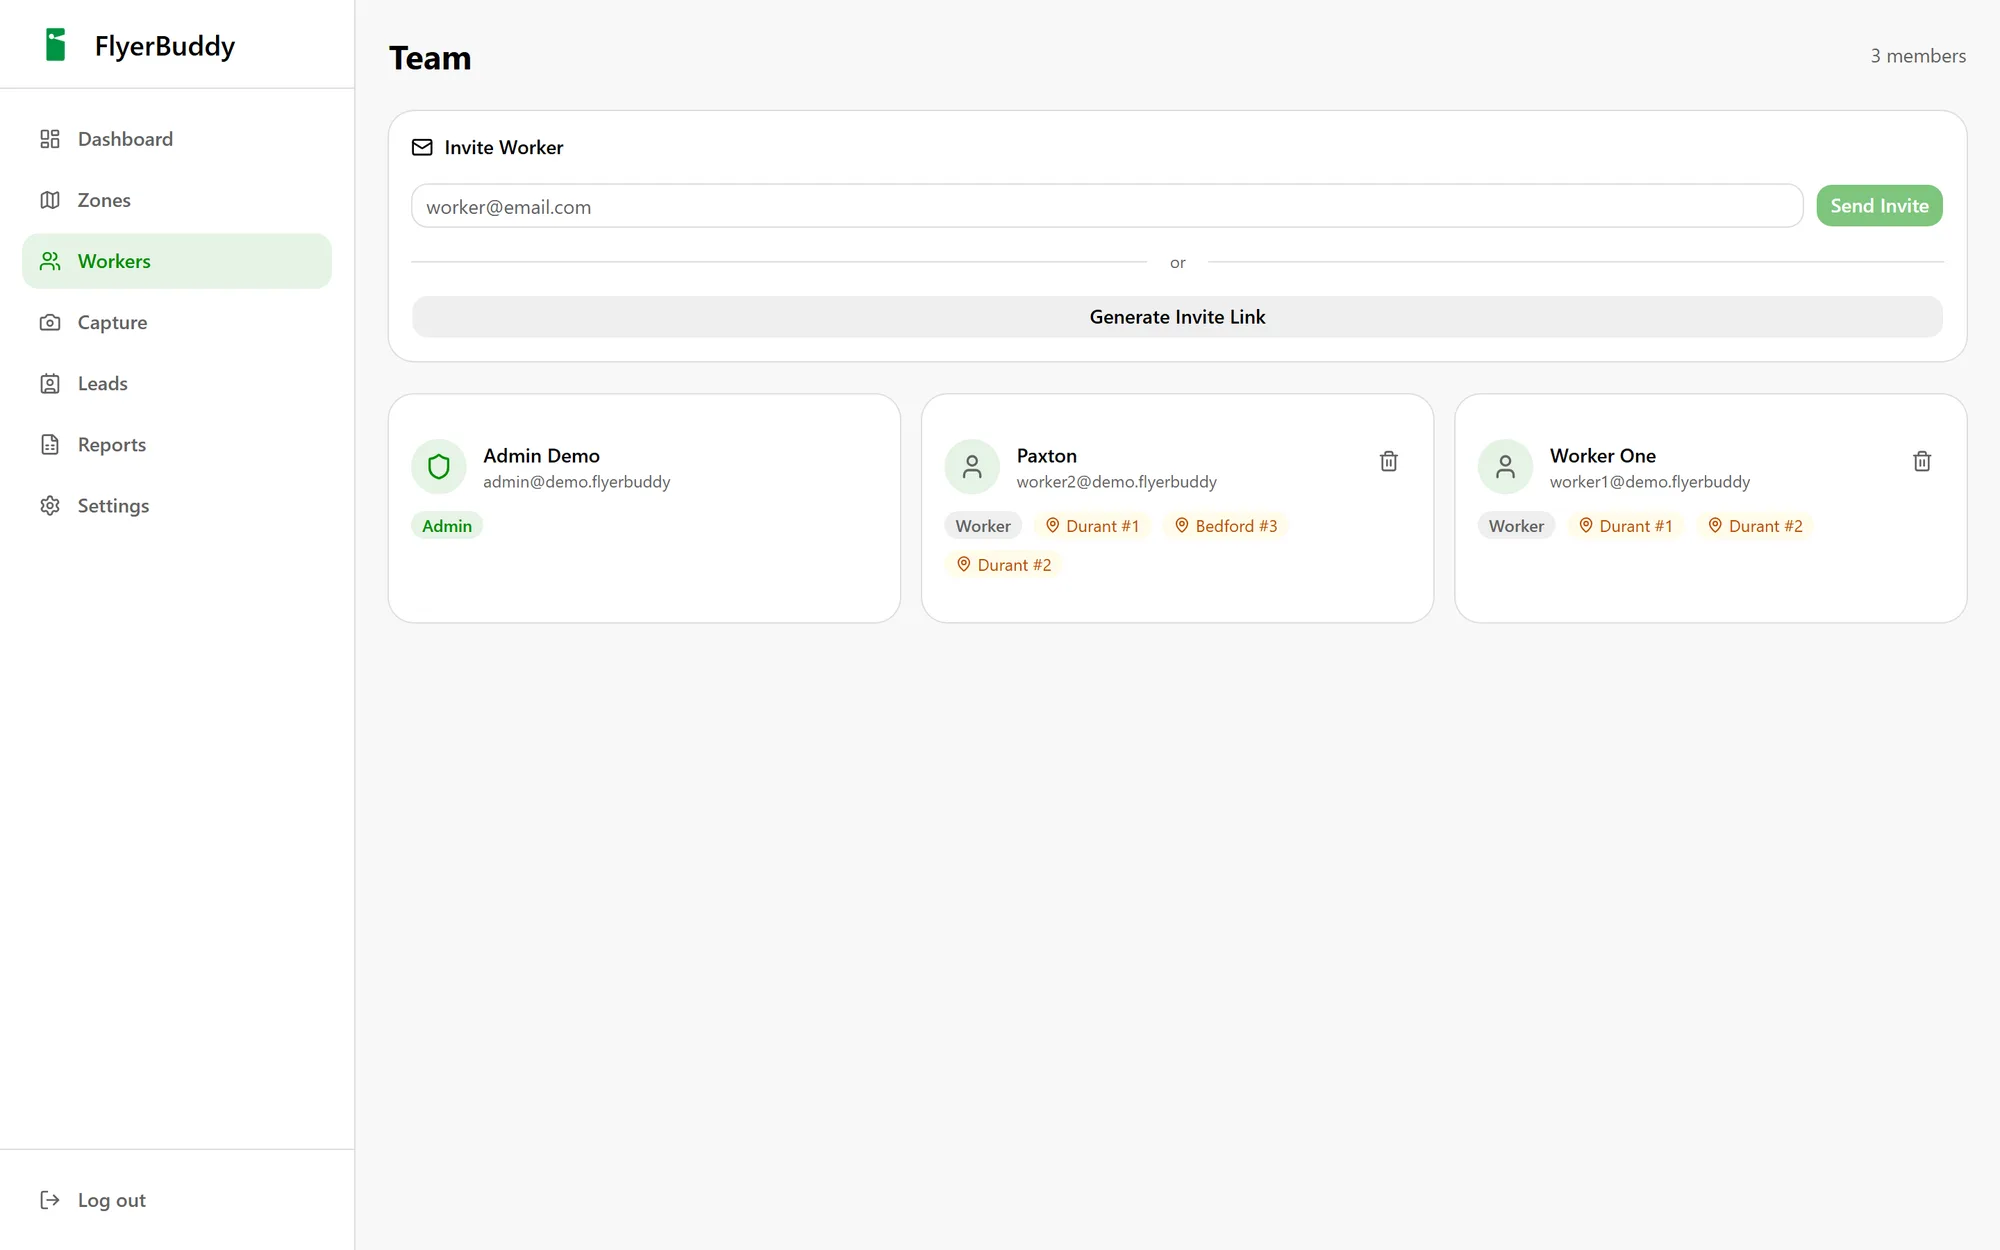
Assign a zone to one person or several. A worker only ever sees their own zones, so two people cannot work the same street by accident and nobody browses the rest of the company's territory. Invite by email or hand out a link.
- Zone assignments visible per worker
- Workers see only what they are assigned
- Admin and worker roles, changeable at any time
Step four — the worker
One screen, one thumb, a few seconds a door
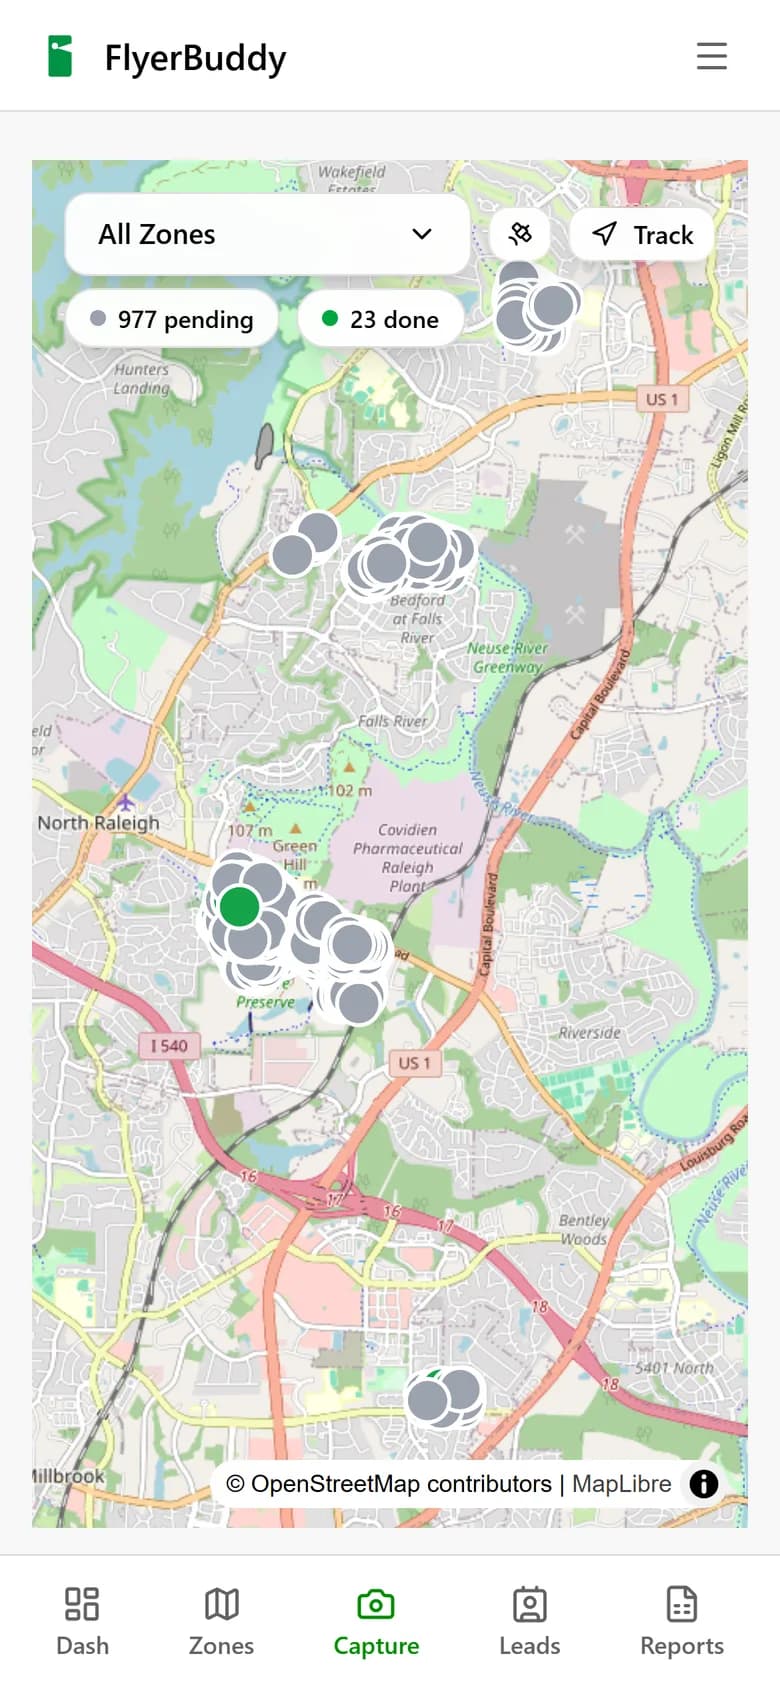
The field view is a map, a camera button and three status options. The worker never types. GPS and time attach themselves, and if the phone is too far from the address on file the drop gets flagged rather than quietly accepted.
- Works offline; drops queue on the device and upload later
- Only the zones assigned to that worker are visible
- Lead details captured at the door, attached to that address
Step five — the audit
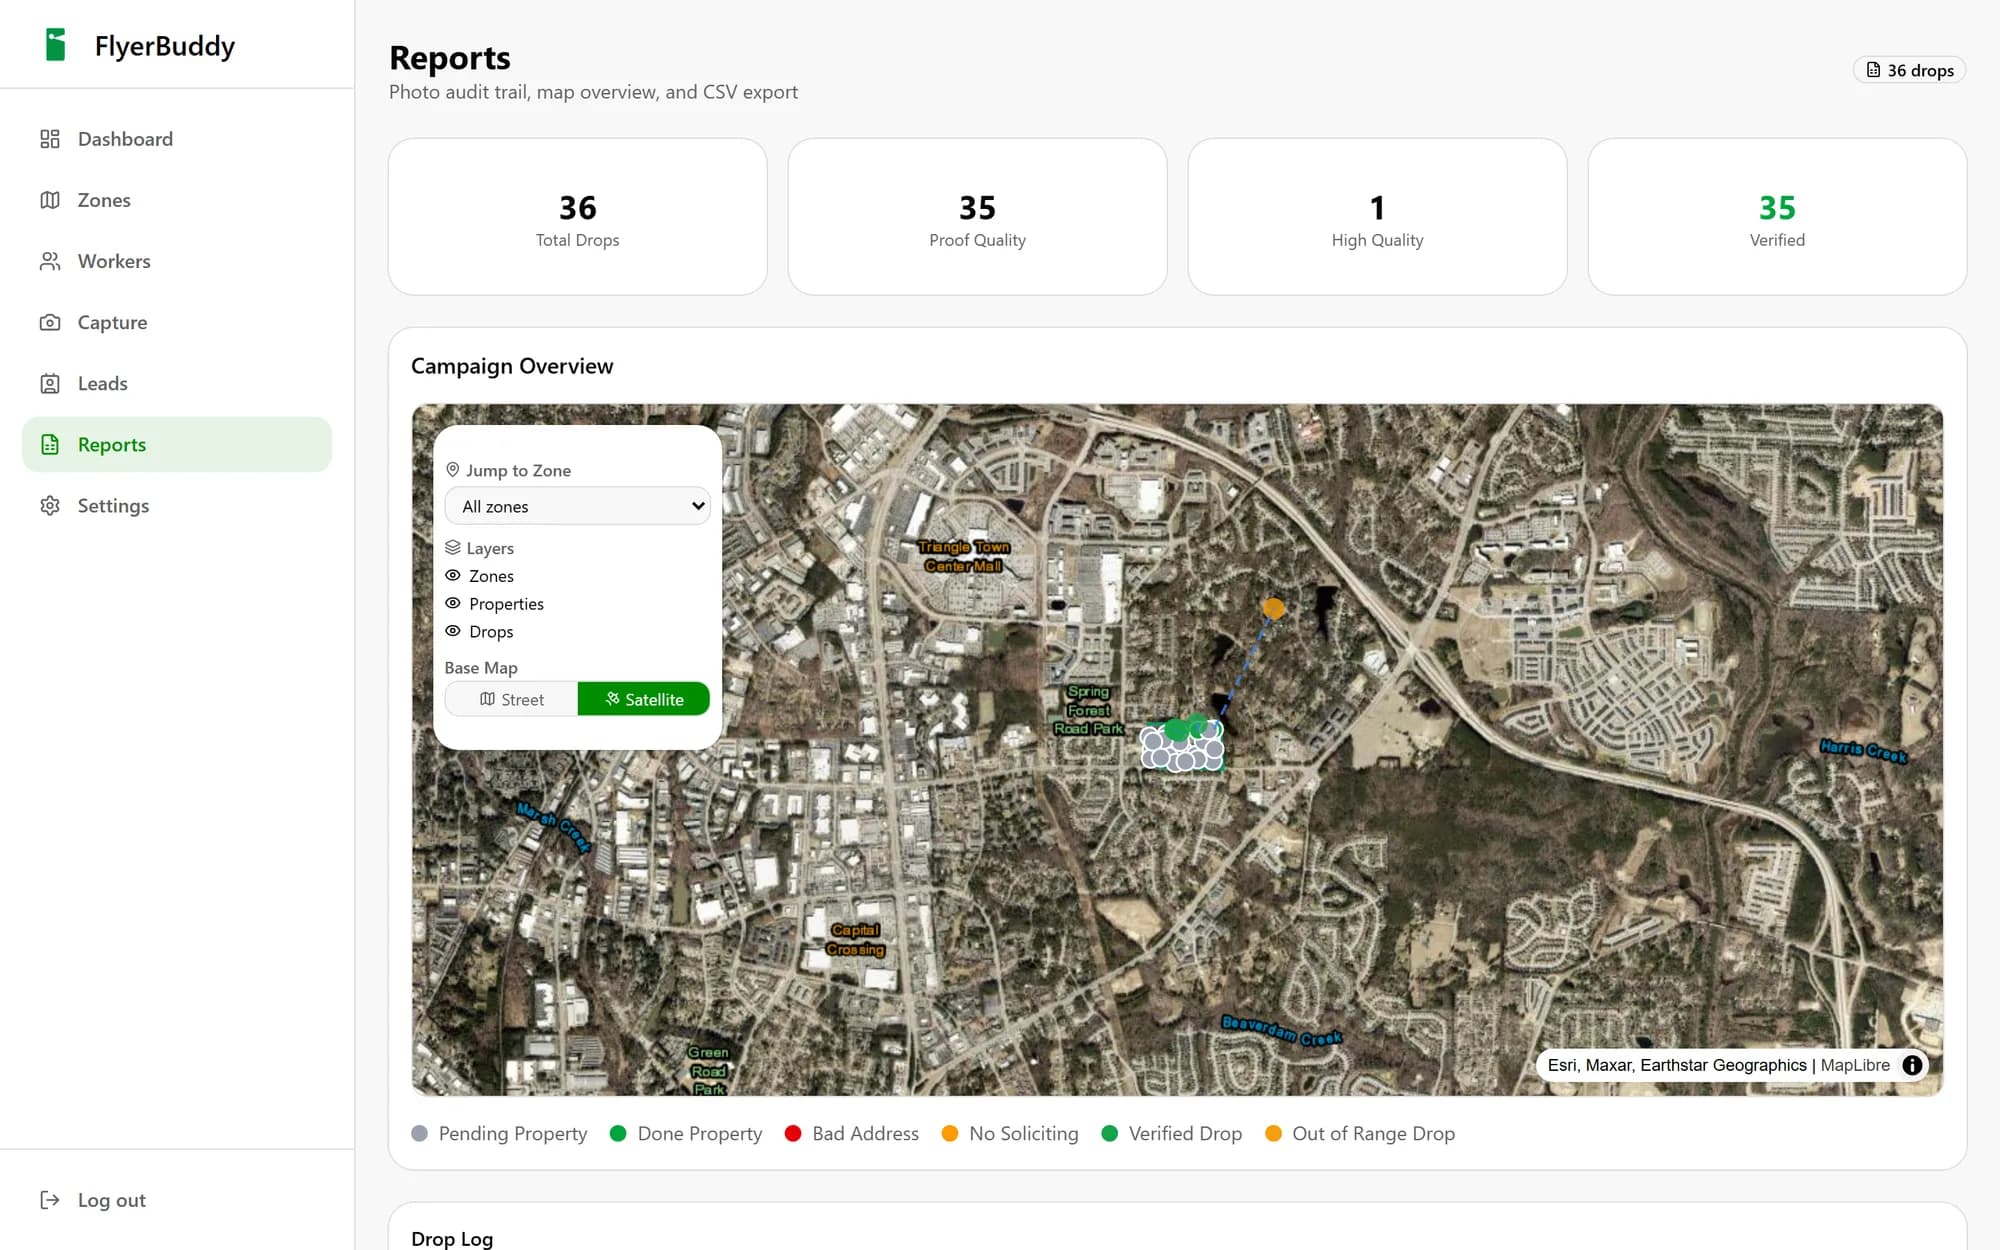
Every drop on one map, filterable
Back at the office each delivery is a pin you can open: the photo taken at the door, who took it, when, and how far they were standing from the address. Coverage gaps read as empty streets rather than a number you have to trust.
- Filter by worker, zone or date
- Distance from the recorded address shown per drop
- Export drops, leads and coverage to CSV
Step by step
The full loop
- 01
Draw the zone
Admin, once per neighbourhood
Trace a neighbourhood on the map. FlyerBuddy reads the buildings inside the boundary from OpenStreetMap, checks each one against a geocoder, and turns them into a list of real addresses. You start with doors, not an empty polygon.
- 02
Assign the work
Admin, start of a shift
Hand a zone to one worker or several. Each person opens the app and sees only their own zones, with completed doors dimmed and the remaining ones highlighted. Two people never work the same street by accident.
- 03
Capture the door
Worker, a few seconds per door
At the door the worker takes a photo and taps a status: delivered, bad address, or no soliciting. The app records the GPS fix and the time alongside it. If they are standing too far from the address on file, the drop is flagged rather than silently accepted.
- 04
Work without signal
Automatic
Drops are written to the phone first. If there is no signal the queue holds them and uploads when the connection returns, so a basement or a rural road does not cost you the record.
- 05
Audit the map
Admin, end of day
Back at the office every drop is a pin. Filter by worker, by zone, by date. Open a pin to see the photo and how far the worker was from the address. Coverage gaps show up as empty streets.
- 06
Export the proof
Admin, whenever asked
Drops, leads and coverage export to CSV. Hand a client, a franchisor or a campaign manager a report built from records rather than recollection.
Your trade
How it runs for your industry
The workflow is the same, but the problems change. These pages walk through the specifics.